
 I've been dying to post for the last week or so because I'm in the throes of tons of wedding crafts (which I will share in due course)...but I've held out for a "most excellent" occurrence:
 Today is my 100th blog post AAANNDD exactly 100 days from the wedding! Woo! Hoo!
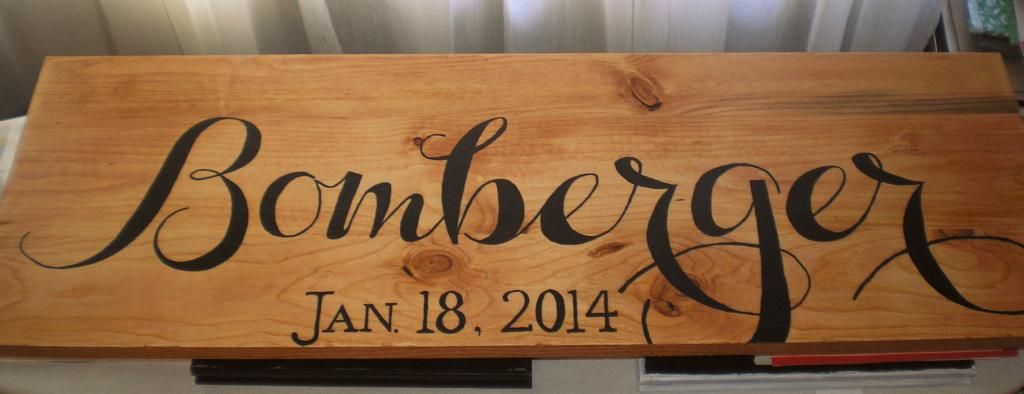
Anyways, to get on to a fun tutorial for today...I give you, the guest "board"! Basically, this craft came from the fact that I don't completely understand the point of guest books at weddings. Everyone signs them but then you put it in a box somewhere and probably never look at it again. So to remedy that pointlessness and to give Strider and I something cool for our new digs (once we find a home, that is), I set to work.
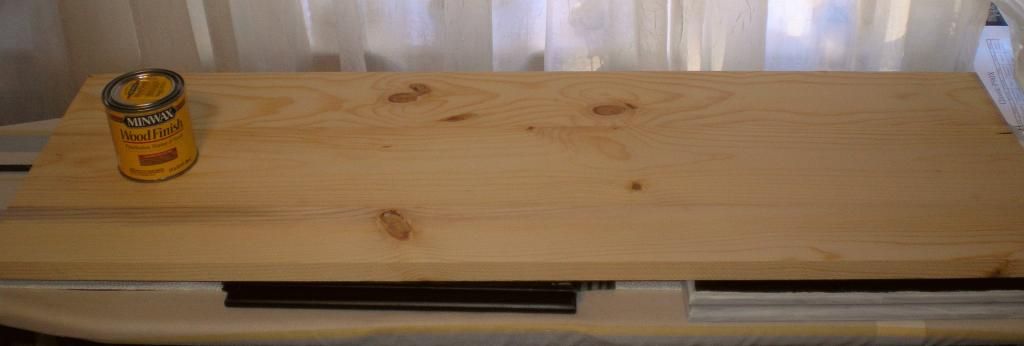
First, (you guessed it) I went to Lowe's. I snagged a great piece of pre-sanded pine board for around $9. The size was a bit in question because I didn't want it to be huge but not too small that people couldn't sign it either. The piece I chose is around 1' x 4' but it could vary depending on your preference and the length of your last name. I then headed over to the paint/stain aisle and picked out a small can of a nice Golden Pecan by Minwax ($5).
I then carefully traced my final lines with a fine tip Sharpie. I let it dry an hour or so just to be sure then used a sponge brush to apply the wood stain. I did two coats, front and back, allowing it to dry completely between each.

After that dried overnight, I took it outside and sprayed it with an aerosol clear Polyurethane. I didn't want to use a painted sealer in case the acrylic smeared, but once the aerosol layer dried, I did go back and back two cross-hatching layers of satin Polyurethane with a brush to seal it really well. After the wedding, I will seal it again with everyone's contributions to make it a permanent fixture for our new home. Final product = ta da!
Thoughts on other non-traditional guest "books"?
Hope you like it!
No comments:
Post a Comment
Thanks so much for your comment! I really love reading them and look forward to hearing what you have to say!